


|
|
|
|
This page describes some of the tweaks that I have done to improve my HT equipment.
1. Bass management tweak on Rotel RSP-1066
2. DVD player Philips 963SA component output fix
3. DVD player Philips 963SA : region free fix
4. 1080i firmware on the DVD player enables 1080i upscaling on the component outputs.
5. Gray scale calibration in projector (Z1 and Benq PE8700)
1. Bass management tweak on Rotel RSP-1066
The Rotel RSP1066 has innovative bass management which works very well except for 1 situation.
If you have large main speakers and a subwoofer bassmanagement of the rsp1066 results in unwanted bass doubling when using the 5.1 analogue input.
All bass below 100Hz of the other channels is copied to the subwoofer output. So this bass will go to both your large speakers and to your subwoofer.
As such it is doubled.It was meant for peaple with sattelite speakers to be able to listen to SACD.
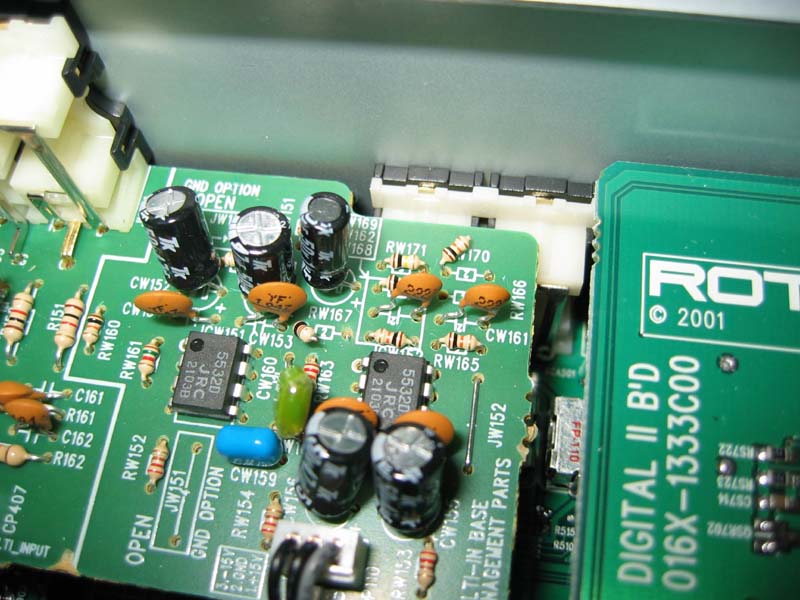
A Rotel approved fix consists of snipping two resistors on the 5.1 input board. RW167 and RW170 are cut on the picture below.
If you leave a little metal on either side of the cut, you can always solder the resister back into operation if you want to undo the fix.
Without this fix bass meant for the main channels is also routed to the subwoofer, thus causing double bass.
With these resistors cut the 5.1 input becomes a full analogue passthrough with no digital signal processing at all.
Also see : description of BM tweak on the RSP1066.
2. DVD player Philips 963SA green band on component output fix :
On some projectors it appears that there is a green vertical strip visible on the left of the screen when uisnig the 963sa component output.
It is not always clearly visible, but when the picture shows eg. an evenly lightgrey screen there is a
slight green bar visible running from the top of the screen all the way to the bottom.
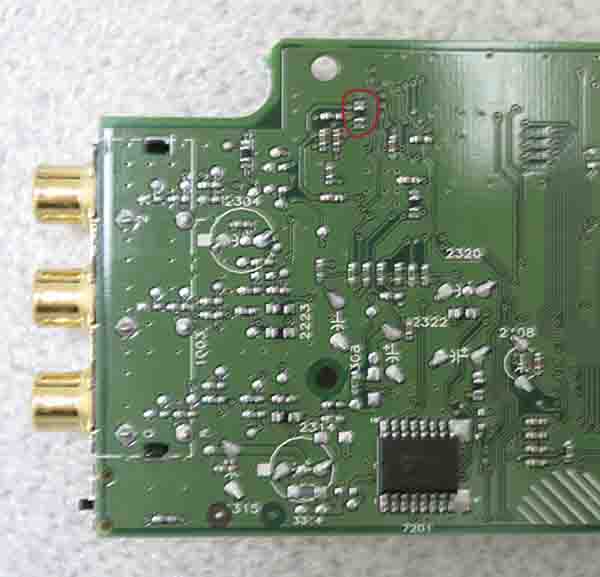
This can be solved by soldering a short cut between the two points shown on the photo below.
I have done this procedure on 2 different 963Sa players with success. The green stripe is completely gone.
3. DVD player Philips 963SA : region free fix
Philips players are easy to make region free. I use the pronto.ccf configuration file (downloadable from the pronto page). The pronto sends a special IR code to the player after which dashes appear in the display of the 963SA. You then type the digits and finish by pressing 'play' after that the 963 is region free and can play disks from all regions.
procedure :
- switch on the player but without a disk in the tray.
- send RC6 4 235 code from the pronto
- dashes appear in the display
- press the following digits on the remote (they will appear on the display) : 222222 005255
- press play
Now the player is regionfree!, it is that easy!
notice that the last digit (5) does not fit on the display. This is not a fault, you should type the digit anyway.
4. 1080i firmware on the DVD player enables 1080i upscaling on the component outputs.
You can download a special firmware for the 963SA that will give you an extra option in the video menu.
Next to the already present selection of 480p and 'unprocessed' option a new line with '1080i' will be selectable.
The 963 will upconvert the video to 1080i resolution (1920 x 1080 interlaced).
A normal TV cannot benefit from this but modern projectors can handle this signal.
The result is an increase in sharpness. The feature does not work completely bugfree.
During play the fast forward/reverse should not be used. The output will drop back to a standard 576p output.
I have also noticed that you can not select 1080i after you had 'unprocessed/576p' active.
You must go to 480p and activate that before you select and activate 1080i. Otherwise there will be no picture at all.
Have a normal TV connected to the scart or svideo output of the 963SA to switch selections otherwise it will be
hard to choose menu options after the 963sa does not produce a picture from the component output if you make a wrong choice.
If you want to go back to the latest original firmware you can find it here : 4.81.25 firmware
A small instruction on how to upgrade the 963sa firmware is here : 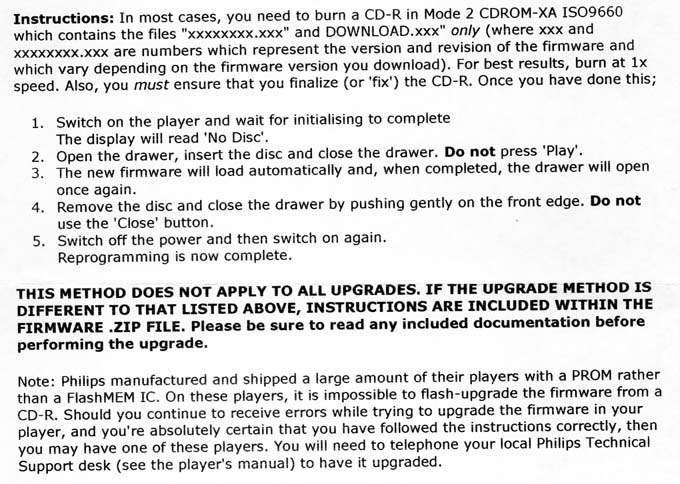
5. Gray scale calibration in projector (Z1 and Benq PE8700)
It is a very easy and big improvement to have your projector calibrated.
Rob Dingen is ISF qualified/certified and performed the calibrations. He also selected and provided the color filter.
A gray scale calibration ensures that all colors are evenly present at all brightness levels in a picture.
On test DVDs like AVIA and "Digital Video Essentials" also known as DVE test images are available.
Images ranging from 100% white, 90% white downto 10% white and perfect black 0% are needed for a grayscale calibration.
These levels are named as 100 IRE, 90 IRE downto 10 IRe and 0 IRe levels designating the amount of light that is emitted
from the screen. A color analyser is needed to analyse the picture at each level of gray and measure the amount of
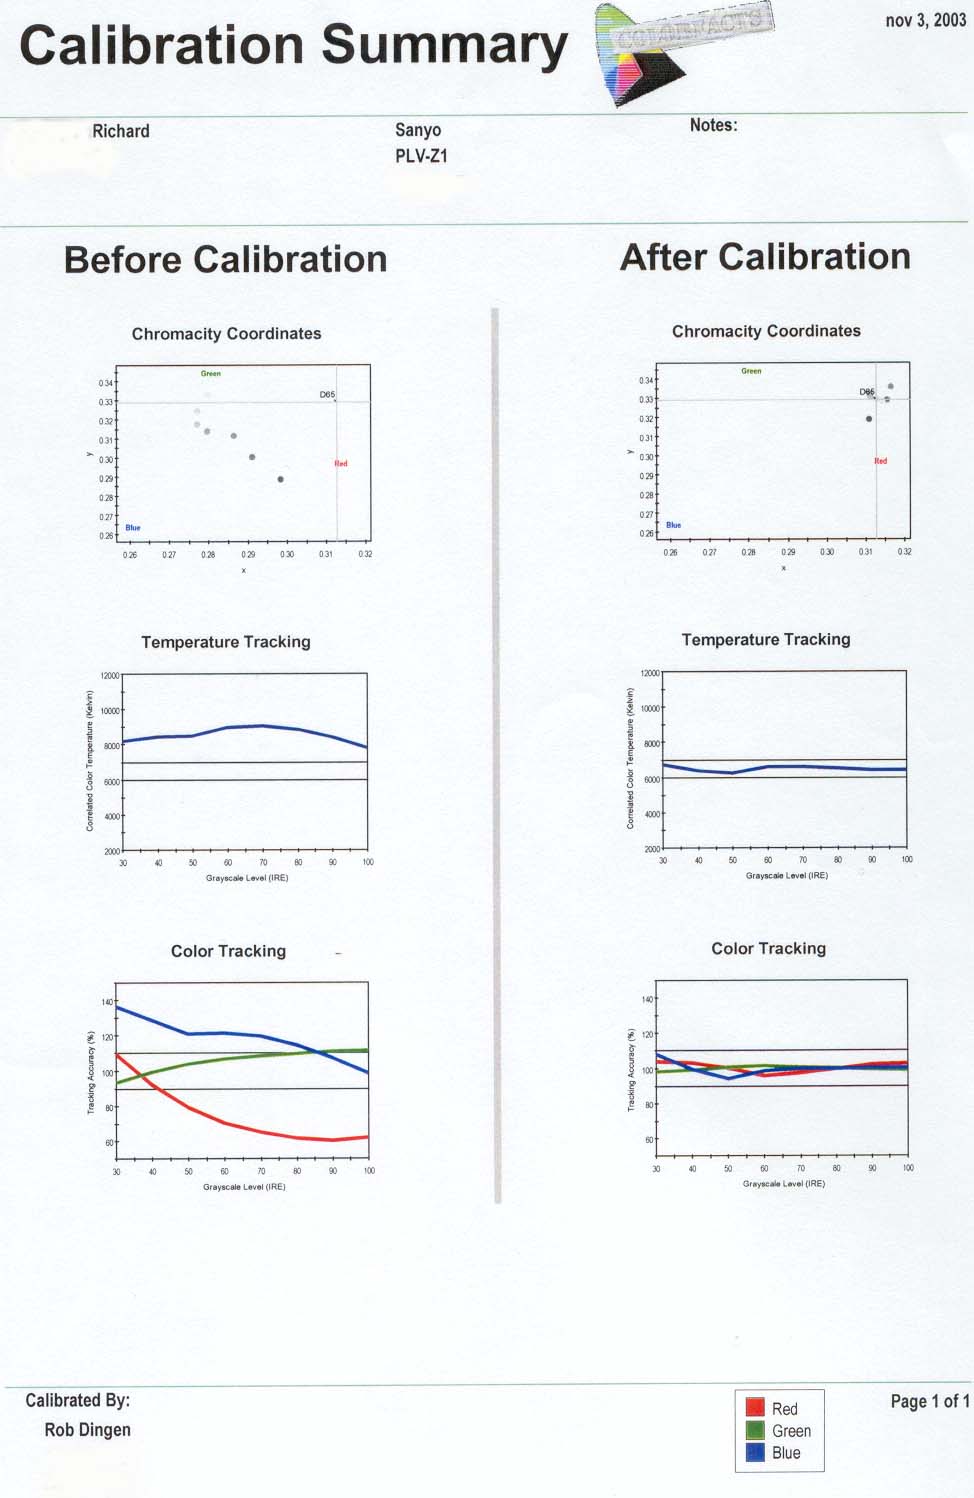
red, green and blue in the picture. A good setup has equal amounts red green and blue in all levels of gray.
Usually first the weakest color is determined in the projector. Often this is red. Then the Green and blue colors
need to be adjusted down a little to produce the perfect grayscale.
See a graph of the calibration results on the Z1 here.
The next step for me was to work with a glass color filter on the lens of the projector : 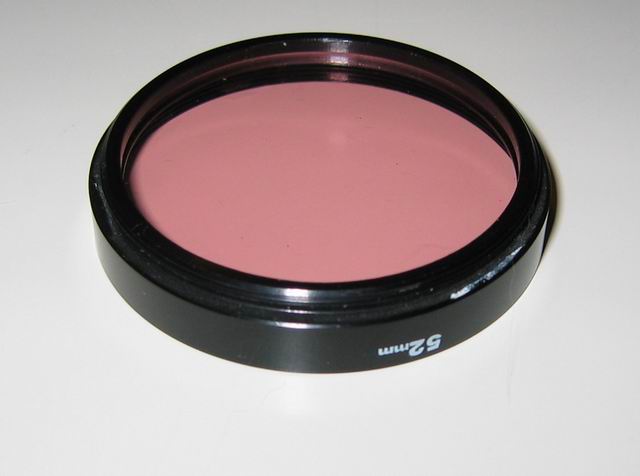
This filter should help the weakest color a little so that the other colours do not need to be toned down as much.
R G and B can be set on a scale from 0 - 512. To get an even grayscale
Red gamma gain needed to be set to the highest possible value and green and blue were set around 300-350.
After applying the red filter red stayed close to the maximum while blue and green could be set to 470-480 for an even gray scale.
That means that on a digital level almost the complete range for all three colours is used. This results in a more dynamic picture.
The use of the filter also helps the lowest level of black produced by the projector.
This so called 'black level' is very important as it helps to make the image more realistic and gives the picture greater depth.
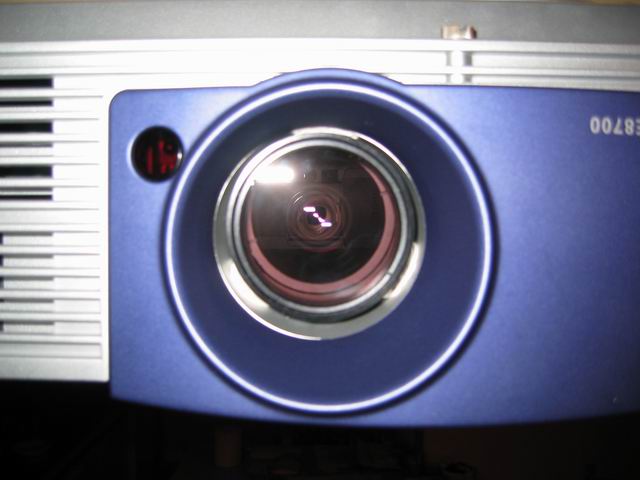
The filter was a 52mm size but the lens of the BenQ does not have a thread. I used a fitting ring 52->49mm + a 49mm distance ring. I used pritt sticky buddy stuff to fasten the fitting rings in the lens mound of the BenQ, just a few mm in front of the lens. Then the filter can be screwed onto the fitting ring. This way I can take the filter off for cleaning and leave the other rings fixed to the projector.
Picture of the projector with CC filter mounted.
The calibration results can be seen in the graph below :
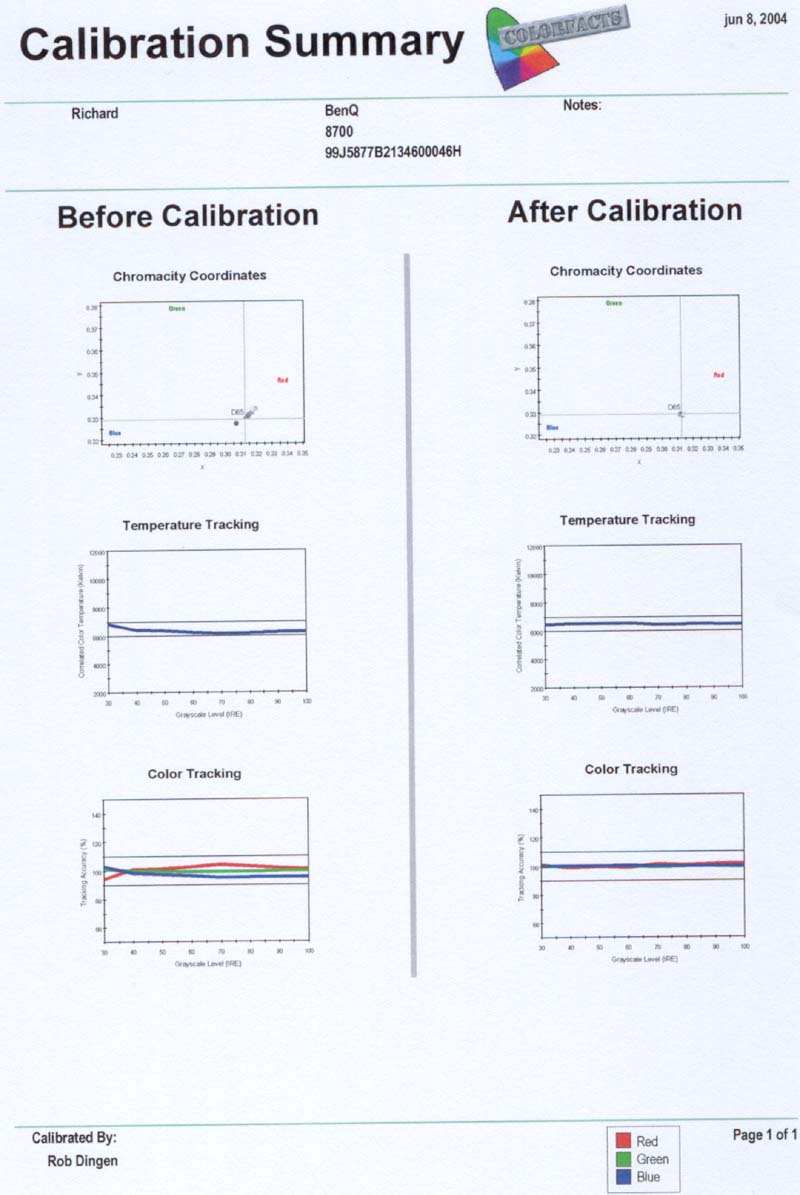